- What Is USDT TRC20 and Why Use It?
- What You Need Before Adding USDT TRC20 to Trust Wallet
- Step-by-Step: How to Add USDT TRC20 to Trust Wallet
- How to Receive USDT TRC20 in Trust Wallet
- Common Mistakes and Troubleshooting
- Conclusion on How to Add USDT TRC20 to Trust Wallet in 2026
- Frequently Asked Questions (FAQs) on How to Add USDT TRC20 to Trust Wallet
If you’ve been searching for how to add USDT TRC20 to Trust Wallet, chances are you’re about to receive a payment or move funds using the TRON network.
There are multiple versions of USDT available including ERC20, BEP20, and TRC20, so it’s easy to get confused and make mistakes.
In this step-by-step guide, you’ll learn exactly how to add USDT TRC20 to Trust Wallet, how to receive it correctly, and how to avoid the most common errors people make when dealing with TRC20 transactions.
Let’s walk through the process.
Related:
- USDT TRC20 Contract Address: What is it & How to Check it?
What Is USDT TRC20 and Why Use It?
Before you add USDT TRC20 to a Trust Wallet, you need to understand what it actually is because using the wrong version of USDT is one of the most common mistakes people make.
USDT (Tether) is a stablecoin, which means its value stays close to $1, and people use it to send money, trade crypto, or store funds without worrying about price swings.
What makes it extremely important is that USDT exists on different blockchain networks. One of the most popular versions is USDT TRC20, which runs on the TRON network.
When someone says “send USDT via TRC20,” they specifically mean you should send USDT using the TRON blockchain.
So why do so many people prefer TRC20?
Because it offers:
- Very low transaction fees, much cheaper than Ethereum
- Fast transfers usually confirmed within minutes
- Wide support on exchanges and wallets
For many users, especially those moving smaller amounts or transferring funds frequently, TRC20 is simply more efficient.
Now that you understand what USDT TRC20 is and why it’s used, let’s go over how to add USDT TRC20 to Trust Wallet safely.
Related:
- 11 Best USDT Trading Platforms, Ranked
What You Need Before Adding USDT TRC20 to Trust Wallet
Before you add USDT TRC20 to Trust Wallet, there are basic things you need to sort out to prevent mistakes, especially cases like sending funds to the wrong network.
Here’s what you need:
1. Trust Wallet Installed and Updated
You need the Trust Wallet app installed on your phone, either Android or IOS. Make sure it’s updated to the latest version so all networks and tokens are available.
If you haven’t installed it yet, download it only from:
- Google Play Store
- Apple App Store
2. An Active Internet Connection
This sounds obvious, but Trust Wallet needs internet access to load tokens, enable networks, and display your TRC20 address.
If your connection is unstable, tokens may not appear immediately.
3. Basic Understanding of Networks
This is the part most people ignore. When receiving USDT, you must choose the correct network:
- TRC20 = TRON network
- ERC20 = Ethereum network
- BEP20 = BNB Smart Chain
If someone sends USDT using ERC20 to your TRC20 address, the funds will not show, and recovery can be complicated.
Read Also:
- USDT Invoice Generator: Create Free USDT Invoices
Step-by-Step: How to Add USDT TRC20 to Trust Wallet
If USDT TRC20 is not showing in your Trust Wallet, don’t worry you just need to enable it. Follow these exact steps:
Step 1: Open Trust Wallet
Launch the Trust Wallet app on your phone. You’ll be directed to the main wallet screen where your tokens are displayed.
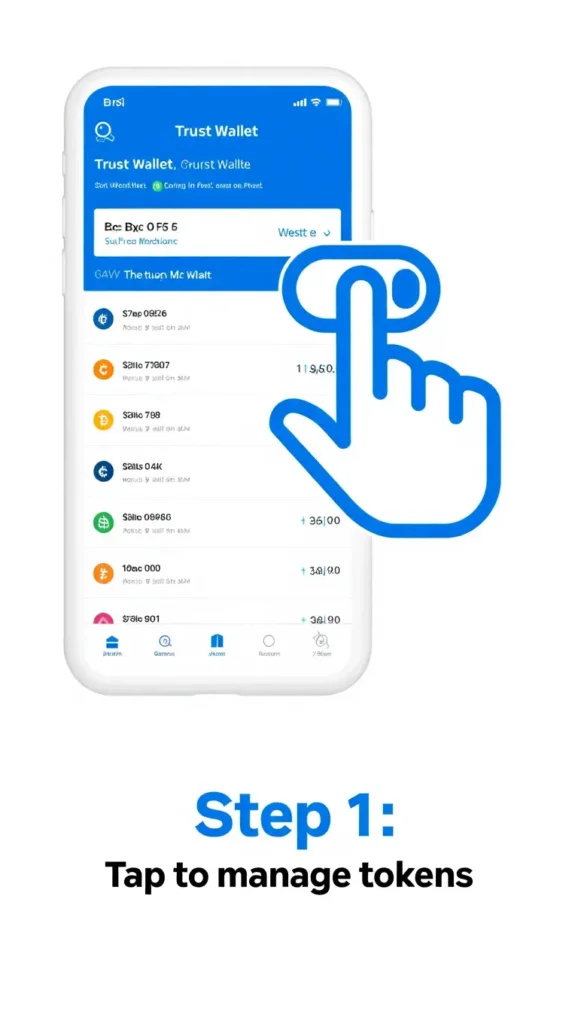
Step 2: Tap the Token Search Icon
In the top-right corner of your screen, tap the two-line filter icon which opens the token search list. This is where you manage which coins appear in your wallet.
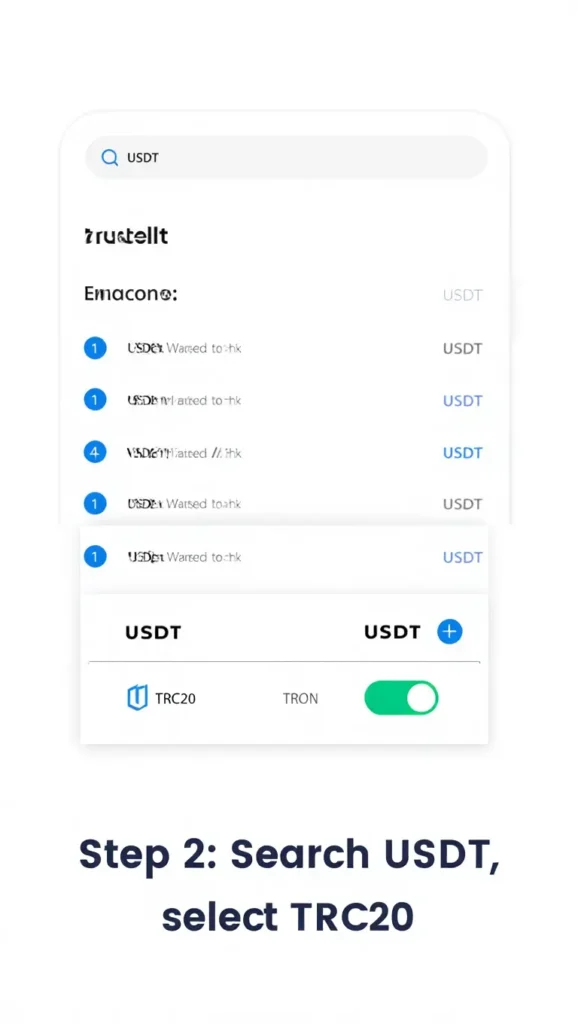
Step 3: Search for USDT
In the search bar, type: USDT. You’ll see multiple versions of Tether appear. This is where many people get confused. Look carefully for USDT (TRC20) and Network: TRON.
Make sure it specifically says TRC20 or TRON.
Step 4: Enable USDT TRC20
Toggle the switch next to USDT (TRC20) to turn it on. Once enabled, go back to your main wallet screen. You should now see USDT (TRC20) listed among your assets.
That’s it. You’ve successfully added USDT TRC20 to the Trust Wallet.
If You Don’t See TRC20 in the List
Sometimes USDT TRC20 doesn’t appear immediately. If that happens:
- Scroll to the bottom.
- Tap “Add Custom Token.”
- Change the network at the top to TRON.
- Enter the official USDT TRC20 contract address (if needed).
Now that USDT TRC20 is visible in your wallet, the next step is knowing how to receive it correctly.
Related:
- How to Add USDT to MetaMask in Minutes
How to Receive USDT TRC20 in Trust Wallet
Now that you’ve added USDT TRC20 to Trust Wallet, the next step is getting your correct receiving address. This is extremely important, because if you copy the wrong network address, your funds may not show up.
Follow these steps carefully:
Step 1: Open USDT (TRC20)
Go to your main wallet screen. Tap on USDT (TRC20). Make sure it clearly shows TRC20 or TRON under the token name.
Step 2: Tap “Receive”
Once inside the USDT TRC20 page, tap the Receive button. Trust Wallet will now generate your TRON (TRC20) wallet address.
Step 3: Copy Your TRC20 Address
You’ll see a QR code and a long string of letters and numbers. This is your USDT TRC20 address. It usually starts with a T because it’s a TRON address.
Step 4: Confirm the Sender Is Using TRC20
Before sharing the address, confirm with the sender if they are sending USDT via TRC20 (TRON). If they choose ERC20 or BEP20 instead, the funds will not arrive correctly.
Always double check the network before confirming the transfer.
How Long Does It Take to Receive USDT TRC20?
TRC20 transactions are usually fast. In most cases, it takes 1–5 minutes for confirmation, especially low transaction fees.
If it takes longer, don’t panic. You can check the transaction status using a TRON blockchain explorer.
Top Pick:
- 7 Free Sites to Check Transaction Hash Online
Common Mistakes and Troubleshooting
If your USDT TRC20 is not showing in the Trust Wallet, don’t be scared. Most issues are caused by simple mistakes.
Here are some common mistakes to avoid when adding USDT TRC20 to Trust wallet. Here’s how to fix them.
1. You Used the Wrong Network
This is the most common problem. If someone sent:
- USDT ERC20 → to your TRC20 address
- USDT BEP20 → to your TRC20 address
The funds won’t show under USDT TRC20.
Always remember:
- TRC20 = TRON
- ERC20 = Ethereum
- BEP20 = BNB Smart Chain
If the wrong network was used, recovery depends on where it was sent from. You may need access to the sending wallet’s private keys.
2. USDT TRC20 Is Not Enabled in Trust Wallet
Sometimes the funds were sent correctly, but the token isn’t turned on in your wallet.
You can fix this by simply doing this:
- Tap the filter icon (top right).
- Search USDT.
- Enable USDT (TRC20).
If it’s not enabled, your balance won’t appear even if the funds arrive.
3. Transaction Is Still Pending
TRC20 is usually fast, but delays can happen. To confirm:
- Ask the sender for the transaction hash (TXID).
- Paste it into a TRON blockchain explorer like Tronscan.
- Confirm whether the transaction is successful.
If it says “Success,” the funds should reflect once the token is enabled.
4. You Added the Wrong Custom Token
If you manually added a custom token, make sure:
- The network is set to TRON
- The contract address is correct
- Decimals are correct (usually 6 for USDT TRC20)
Wrong contract details will cause the balance not to show.
5. You Sent USDT TRC20 But Have No TRX for Fees
If you’re trying to send USDT TRC20 out of Trust Wallet and it fails, you may not have enough TRX. TRON transactions require a small amount of TRX for gas fees.
To fix this, add a small amount of TRX to your wallet before sending USDT.
Whenever you’re adding USDT TRC20 to Trust Wallet or receiving funds:
- Double-check the network
- Confirm the address starts with “T”
- Enable the correct token
- Verify transactions on the blockchain
Related:
- TRC-20 vs ERC-20: Fees & 11 Key Differences
Conclusion on How to Add USDT TRC20 to Trust Wallet in 2026
Now you know exactly how to add USDT TRC20 to Trust Wallet, enable the correct network, and receive funds safely.
Most problems people face like USDT TRC20 not showing in Trust Wallet happen because of network confusion, not because the wallet is broken.
As long as you remember this one rule: TRC20 = TRON network, you’ll avoid 90% of common mistakes. Crypto transactions are irreversible, but they’re also very predictable when you understand the network you’re using.
Now that everything is set up, you can confidently receive and manage USDT TRC20 inside Trust Wallet without stress.
Frequently Asked Questions (FAQs) on How to Add USDT TRC20 to Trust Wallet
Why is USDT TRC20 Not Showing in My Trust Wallet?
If your USDT TRC20 is not showing, it’s usually one of three things:
- The token is not enabled.
- The sender used the wrong network.
- The transaction is still pending.
First, go to the token search icon in Trust Wallet and make sure USDT (TRC20) is turned on.
If it’s enabled and still not visible, ask the sender which network they used. If they used ERC20 or BEP20 instead of TRC20, the funds won’t appear under the TRON network.
Is USDT TRC20 The Same as ERC20?
No, they are not the same. Both are USDT (Tether), but they run on different blockchains:
- TRC20 = TRON network
- ERC20 = Ethereum network
They use different wallet addresses and different fee structures. If someone sends ERC20 USDT to your TRC20 address, it will not automatically show up.
Do I Need TRX to Receive USDT TRC20 in Trust Wallet?
No, you do not need TRX to receive USDT TRC20.
However, you do need TRX if you want to send USDT TRC20 out of your wallet, because TRON requires a small amount of TRX for transaction fees.
If you try to send USDT without TRX, the transaction will fail.
How Long Does it Take to Receive USDT TRC20?
USDT TRC20 transfers are usually fast within 1 – 5 minutes. If it’s taking longer, check the transaction status using the transaction hash (TXID) on a TRON blockchain explorer.
What Happens if I Send USDT Using the Wrong Network?
If you send USDT using the wrong network, recovery depends on where it was sent. If you control the receiving wallet and it supports multiple networks, recovery may be possible. If you sent it to an exchange using the wrong network, you may need to contact their support, and recovery is not guaranteed.